Happy Birthday Easel Card

Yeah!! I made an Easel Card!  This one is for a girl I work with in the office.  I love that it stands up on the desk for everyone to see.

I just got these new dies from Spellbinders and couldn't wait to use them on something stinkin' cute!  I used the Banner Basics Two and the Ribbon Banners die sets.  The tassels and sentiment banner are embossed and inked with Crumb cake ink.


Supplies:  Designer Series Paper (retired), Chocolate Chip, Very Vanilla and River Rock cardstock, Soft Suede classic ink, Crumb cake classic ink, Something to Celebrate Clear-Mount stamp set, Gallery Stamp set and scalloped oval punch, Rhinestones,Banner Basics Two and the Ribbon Banners die sets from Spellbinders and the BigShot.

Operation Write Home Blog Hop


Welcome to my contribution to the Operation Write Home Memorial Day Weekend Blog Hop!  Here's my Missing You Card.  Hope you like it!


Supplies: Basic Grey Cardstock, Nautical Expedition Designer Series Paper, Cherry Cobbler Bakers Twine, The Open Sea - Clear-Mount Stamp, Hodge Podge Happiness - Clear-Mount Stamp, Eyelets, Cherry Cobbler Classic Ink, Soft Suede Classic Ink, Not Quite Navy Classic Ink, Crumb Cake Class Ink, Sizzix Embossing Folder.


Now, Check out the next stop on the Blog Hop, Gerda, StampFairy.
Thanks for stopping by!

All Day Crop, Sat., May 28

Join us for a fun day of scrapbooking tomorrow, Saturday, May 28th from 10:00 am - 6:00 pm. It's only $5/person. I'll have snacks and a small project for everyone. You also get the use of my stamps and tools!

I don't provide lunch but we can order in or you can bring your own.


Hope everyone had a wonderful Mother's Day


I hope everyone had a wonderful weekend and Mother's Day!  I did.  Jordan went to church with me and sat through service.  (This was a big one for him!)  Then, we had lunch at my favorite restaurant, Posado's Tex-Mex!  Yummy!  My husband went overboard and got me a beautiful James Avery bracelet with the birthstones of my two boys and some silver charms.

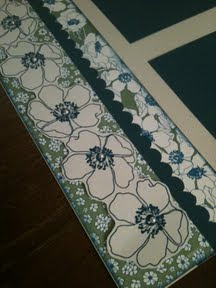
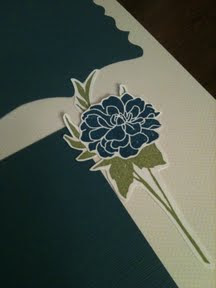
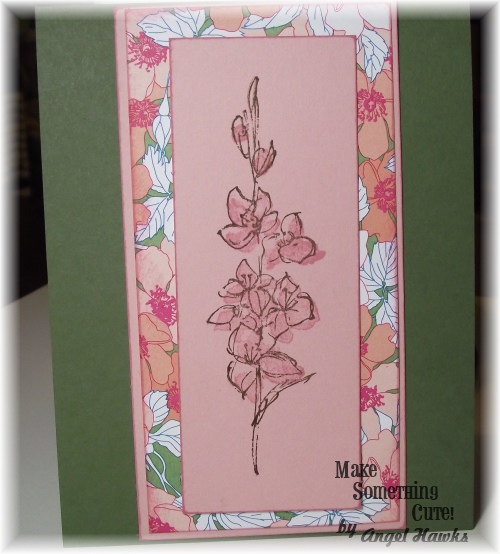
Here are some hand-made cards I made for my mother and sister-in-law.  Hope you like them as well.


Stamps: Fabulous Florets - Clear-Mount Stamp Set,   Something to Celebrate - Clear-Mount Stamp Set
Inks: Versamark, Soft Suede, Blushing Bride, More Mustard, Old Olive
Paper: Early Espresso, Blushing Bride, Whisper White, Beyond the Garden Designer Paper, Glossy White cardstock
Accessories: Blending Marker, Black Embossing Powder
Flowers: 1) Stamp the largest outline flower with Versamark and emboss with black embossing powder.  2)Create a mask on a stickie note by stamping the same image with any color ink and cut it out very closely.  3)Place the mask over the embossed image.  Stamp the image again turned slightly and overlapping a piece of the mask.  Heat emboss this image. 4) Leaving the mask in place, stamp the smaller outline flower image overlapping a piece of the mask.  Heat emboss this image. 5) Using a Blending Marker, pick up color from More Mustard ink pad and color the centers of the flowers. 6) Using a Blending Marker, pick up color from Blushing Bride ink pad and color the rest of the flowers. 7) Cut out the flower grouping. 8) Stamp the solid stem image on whisper white with Old Olive ink and cut out.

Stamps: Fast & Fabulous - Clear-Mount Stamp Set 
Inks: Soft Suede, Blushing Bride
Paper: Blushing Bride, Always Artichoke, Beyond the Garden Designer Paper

Happy National Scrapbooking Month!

Howdy, MSC Fans!   May is National Scrapbooking Month! 

To celebrate Stampin' Up! is offering 30% a wide selection of scrapbooking products including 
You can download your copy of the new Summer Mini HERE or contact me to receive a copy in hand.   
To Order supplies, check out what's new, sign up for a class or workshop - View my Blog - Check Out My Website - Or E-Mail Me.   Shop online 24/7 and ship direct to you or contact me for more personal service.  My service doesn't stop once you place your order.  I am happy to help you sort your order, mount stamps, or answer any questions you may have. All you have to do is ask! 

Simple Easter Baskets

I got a Wild 'Hare' last night and decided to be the Easter Bunny for my office.  Talk about the last minute... It was at 10:30pm when I sat down to make them.  Good thing they are easy to make.  I made 12 and it took me about 2 hours.  Not too bad.

I am trying to use up a bunch of paper and stuff that I have in my stash.  On this project I used a 9x9 paper pack from The Angel Company called Genevieve and some random brads from American Crafts and Making Memories.  If I had started sooner, I would have inked the edges and used a decorative punch on the handle, etc.  Ah, but alas, I don't often work that way. LOL!


I used some paper moss for the grass in the baskets and punched tags using my scalloped oval punch from Stampin' Up.  Then, I filled them with those little chocolate eggs wrapped in decorative foil.  So cute!  Everyone at the office was surprised and loved them!

Here's how you make them:
  1. Cut a 6"x6" square of cardstock paper.  If you use light-weight printed paper, I would glue it to cardstock first to make it thicker.
  2. Score the paper at 2" and 4" in both directions on the paper so that you have a 9 square pattern.
  3. Then, cut vertically down to the 2" score line at 1", 2", 4" and 5" across the top of the paper.
  4. Turn the paper around to the bottom edge and repeat step 3.  Your paper should look like this with the dashed lines scored and the solid lines cut.
  5. Next, in the upper and lower squares in the center section of the paper, you are going to cut them into a triangle.  I marked the paper at 3" along the upper and lower edges of the paper and cut from that mark to the intersection of the 2" score line and the 2" cut line as shown here.
  6. Now, just fold all the score lines in and start assembling your basket by pulling in the 1" strips on either side of the triangle over to meet up with the point of the triangle.  Then, pull the outter strips in so that they are evenly across from each other.  You can glue them together if you want to keep them from slipping.  Then, punch a hole through all the layers with a Crop-O-Dile or a piercing tool.
  7. Insert a brad to hold them together.
  8. Cut a 1 1/2" x 6" strip for the handle and punch a hole on either end of the strip centered and about 1/2" from the edge.
  9. Insert the brads into the holes on the strip for the handle and spread the brad's prongs.
You're all done!!
I hope you like this project!  Now, go Make Something Cute!  And have a Happy Easter!

Contest Update - Beat by Cookie Monster!

Thank you all for voting for my flowers in the Scrapbooks Etc Craft It Forward contest!  Unfortunately, I was beat out by Cookie Monster and Elmo.  Sad Face :-(  Oh, well.

Here's a new card I made over the weekend. I CASE'd from another blogger, Renee, Inkspirations Challenge #65.  I made mine a bit larger and created a little nest from the branch of the bird punch.


I used Night of Navy for the card, Marina Mist for the circle and inside of the card, Ivory for the sentiment, Old Olive for the branches, Crumb Cake for the nest, and Soft Suede for the birds.  I inked the branches, sentiment and birds with Soft Suede ink.

I hope you like it.  I think it turned out really cute!

LinkWithin

Related Posts Plugin for WordPress, Blogger...